Painting
6 Watercolor Techniques Every Beginner Should Know
Watercolor has a reputation for being unpredictable — and honestly, that’s part of the magic. But the more you understand how water, pigment, and paper interact, the more confident (and relaxed) your painting becomes.
Following are six essential techniques you’ll see over and over again in watercolor. You don’t need fancy supplies or years of experience to try these — just a brush, some paint, and a willingness to let the water do some of the work.
1. Wet-on-Wet
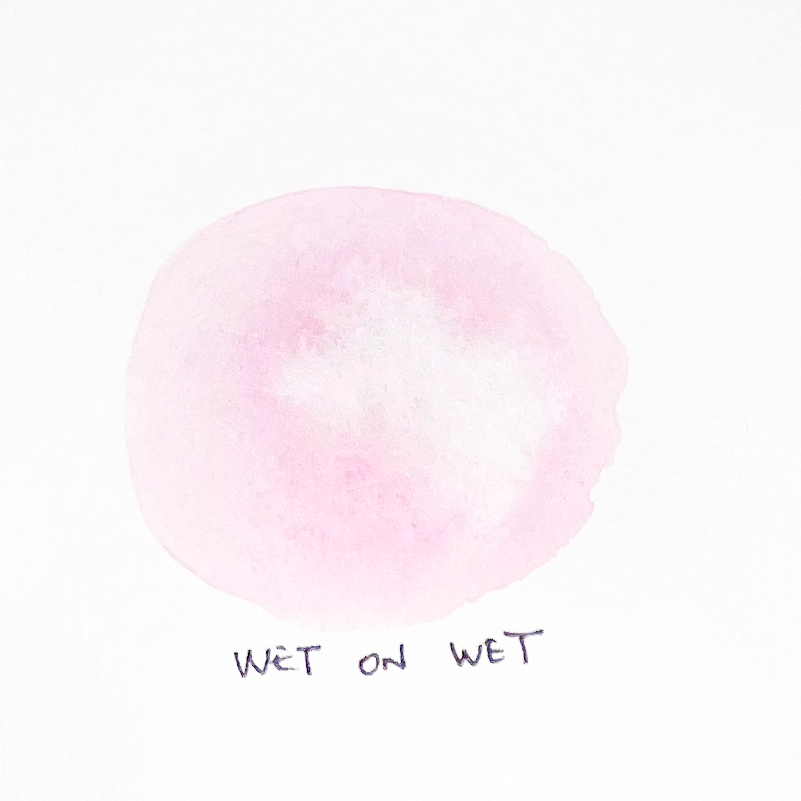
What it is:
Wet paint applied onto wet paper (or into a wet area).
What it looks like:
Soft edges, gentle blending, colors that bloom and move.
Why we love it:
This technique creates that loose, flowing look people often associate with watercolor. It’s expressive, forgiving, and perfect for letting go of tight control.
Great for:
Backgrounds, florals, skies, abstract shapes, and anything that benefits from softness and movement.
Beginner tip:
Watch the shine on the paper. If it’s very shiny, paint will spread a lot. If it’s just damp, you’ll get more control.
2. Wet-on-Dry
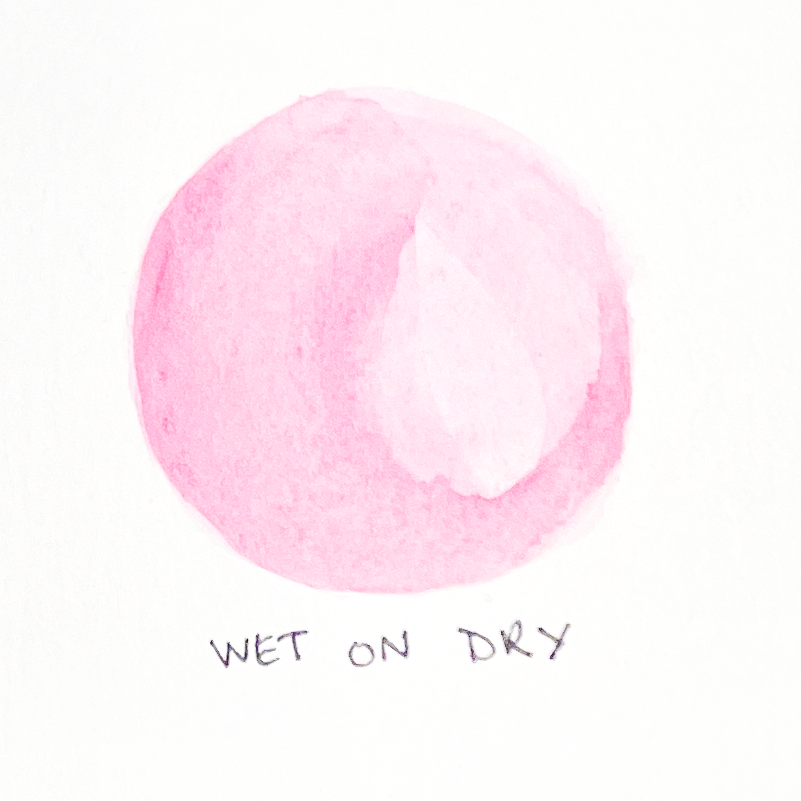
What it is:
Wet paint applied onto dry paper.
What it looks like:
Cleaner edges and more defined shapes.
Why we use it:
When you want clarity — petals, leaves, or a focal element — wet-on-dry gives you more control than wet-on-wet.
Great for:
Details, defined shapes, layering on top of loose washes.
Beginner tip:
Make sure your paper is truly dry before starting, or you’ll get unexpected bleeding.
3. Dry-on-Dry (Dry Brush)
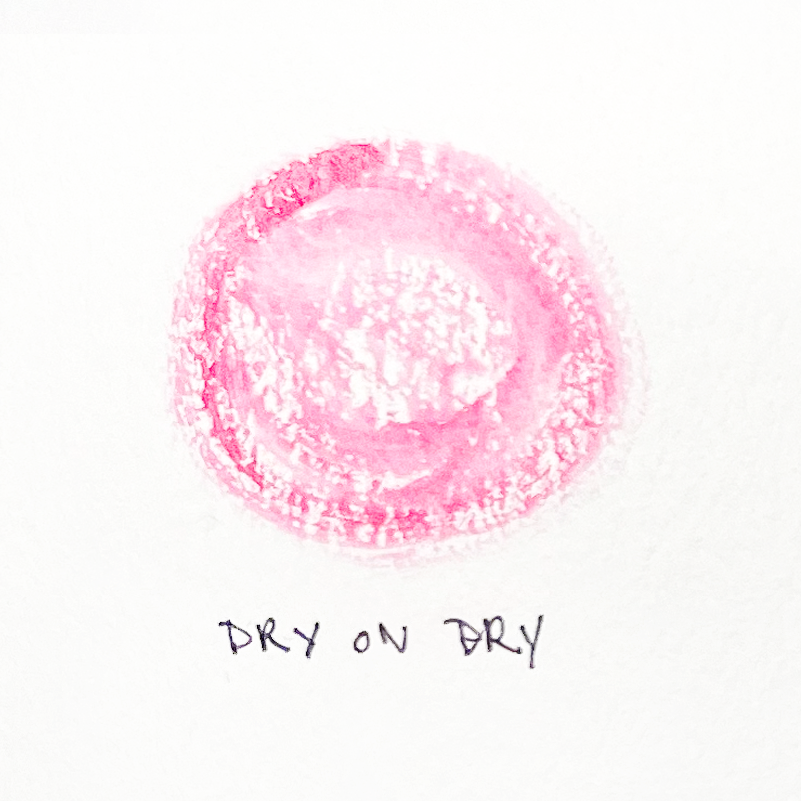
What it is:
A mostly dry brush dragged across dry paper.
What it looks like:
Broken, textured marks that skip across the paper.
Why we use it:
It adds texture without adding more water — perfect for expressive, painterly details.
Great for:
Stems, wood grain, feathers, texture in abstract work.
Beginner tip:
This works best on cold-press paper, which has more surface texture for the brush to catch on.
4. Glazing
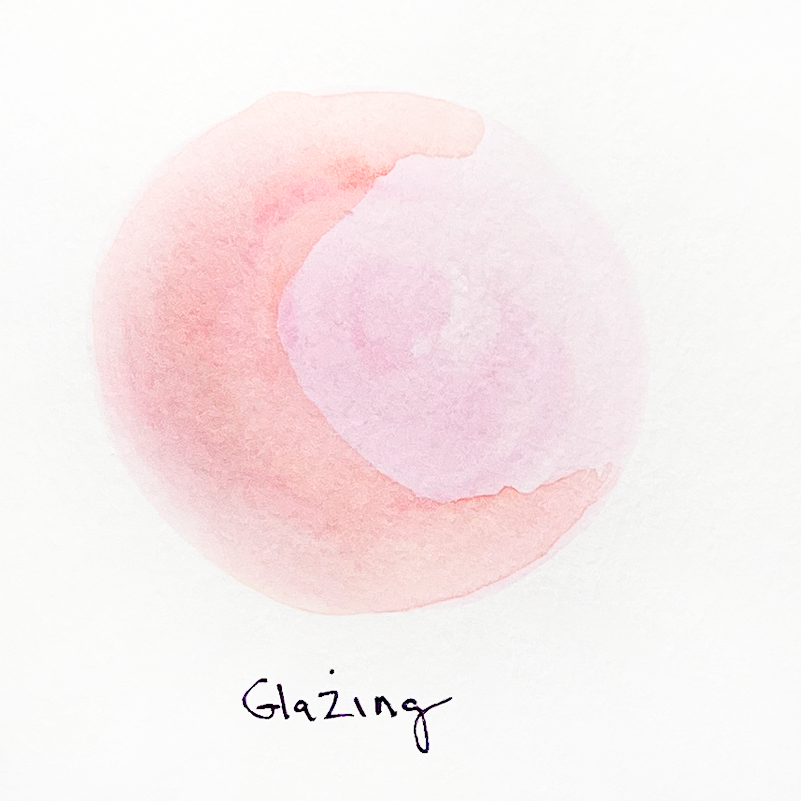
What it is:
Applying a transparent layer of color over a completely dry layer underneath.
What it looks like:
Richer color, more depth, and subtle color shifts.
Why we use it:
Glazing builds complexity without muddying the painting. Each layer adds depth while keeping the watercolor luminous.
Great for:
Shadows, adjusting color, adding dimension slowly.
Beginner tip:
Patience matters here. If the first layer isn’t dry, the colors will mix instead of layer.
5. Charging
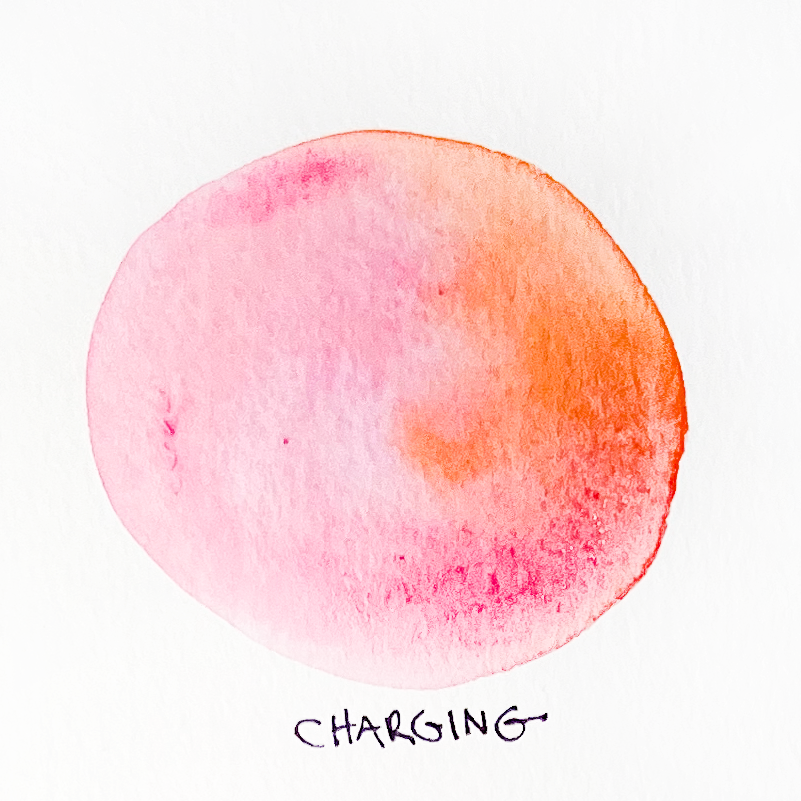
What it is:
Dropping a new color into an area that’s still wet.
What it looks like:
Blooms of color that blend naturally into each other.
Why we love it:
Charging keeps paintings lively and spontaneous. It’s one of the easiest ways to make watercolor feel expressive instead of flat.
Great for:
Florals, abstract shapes, adding variation and interest.
Beginner tip:
Try charging a darker color into a lighter wash for dramatic, beautiful results.
6. Lifting
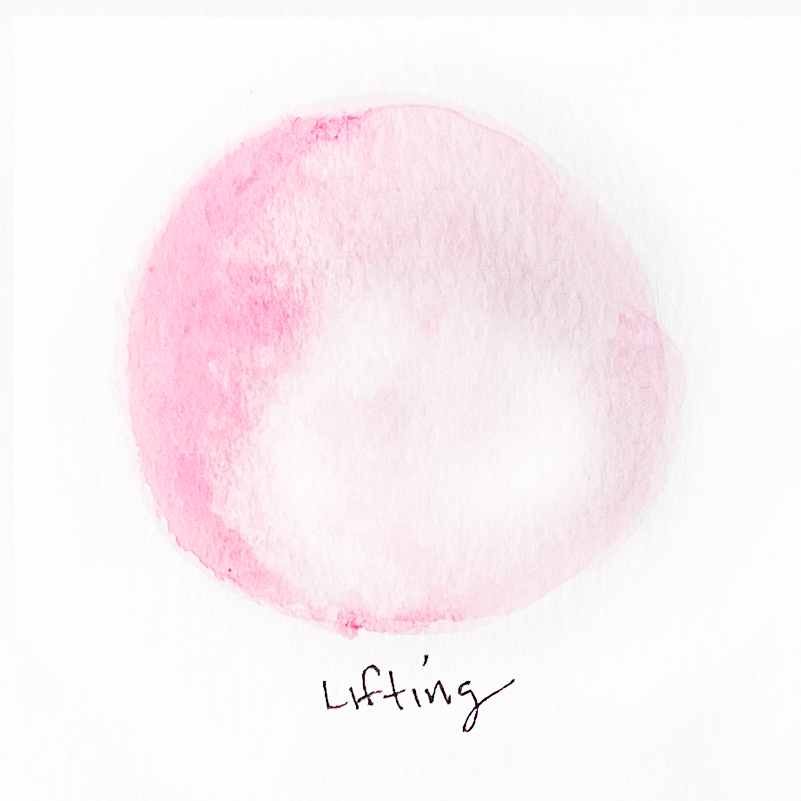
What it is:
Removing paint from the paper using a damp brush, paper towel, or sponge.
What it looks like:
Lighter areas, soft highlights, or subtle texture.
Why we use it:
Watercolor is transparent, so lifting is how you bring the light back.
Great for:
Highlights in petals, clouds, correcting small mistakes.
Beginner tip:
Some pigments stain more than others, so lifting works best when paint is still slightly damp — or with non-staining colors.
Putting It All Together
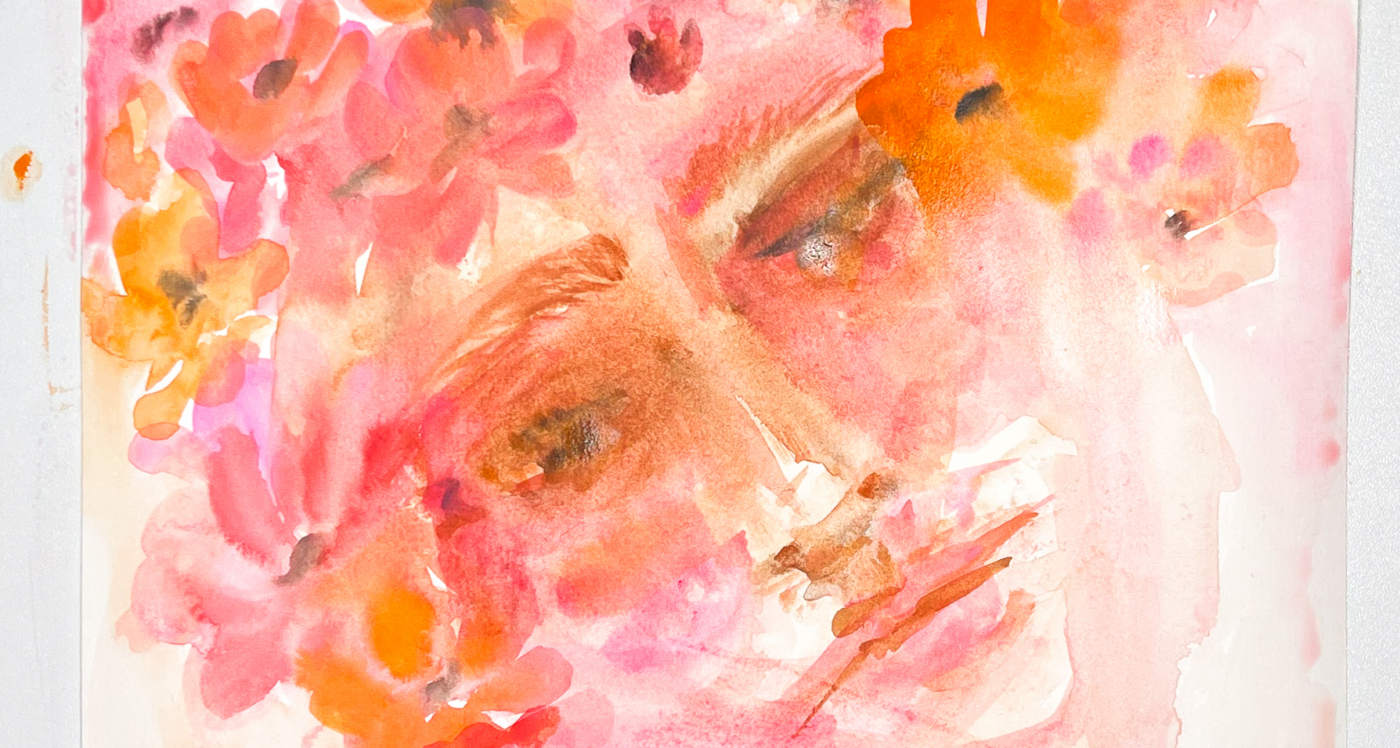
Most watercolor paintings use several of these techniques at once — loose, wet-on-wet foundations, wet-on-dry details, glazing for depth, charging for energy, and lifting for light.
Watercolor isn’t about controlling every mark. It’s about understanding how water behaves, and then letting it surprise you.